Busted air piston on DLR80

Holmespi1990

New Member
I was changing the seals and oil on my super fatty ultra DLR80 and snapped the air piston while I was putting the air piston back in .I’m having trouble finding a replacement, does anyone here have any tips or leads? If you can tell from the picture I tried to in weld it, as there wasn’t much to loose, but this failed as predicted. Think it could be 3d printed, haha?
image.jpg
 
Last edited:

Holmespi1990

New Member
I'm not a 100% sure if this is the same things. I am not insanely familiar with the internals of Headshoks.
That looks pretty close, but it doesn't look like it will fit the style I have. Thanks though! I did find a damper for sale that has an air piston in it, it's a kind of expensive option though.
 

JohnnyD

Well-Known Member
That looks pretty close, but it doesn't look like it will fit the style I have. Thanks though! I did find a damper for sale that has an air piston in it, it's a kind of expensive option though.
Unfortunately, the expensive options are sometimes all we are limited too when it comes to maintaining and repairing HeadShok or Lefty forks. .. Hopefully, you will find the part you are looking for without having to sell a kidney or something.
 

gfacer

Active Member
Late reply but....

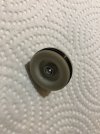
I have one that can be bought (there are two versions that the same guys sell). But, after deciding a rebuild wasn't worth the cost, I decided to try taking my sl80 (I think?) apart. Sure enough, this air piston part was broken.

Looking online, I saw I could buy one, and since otherwise was leaning towards a bearing conversion set to run other forks in the Raven frame, I decided to experiment.

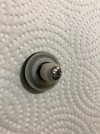
What I decided to do was drill and tap the inside of the part where the air hole once was. Tapped hole in the top, a through hole in the "base". A #8screw then goes up through the base and holds the broken threads on. I have done this part already and it seems to work. Next step is a new small o ring (that one seems to be a plumbing #6 o ring) and getting a brass screw. Then drill out the brass screw's center for the passage of the air and an o ring at the screw head just because....not really sure any leakage there would matter.

Alternatively, on mine, the thread was 7/16 coarse, so I could have drill and tapped the base for that and just put a nylon screw up the middle, maybe epoxied in. Since I have not yet finished, call this plan B.

If my break was like yours, I might have only considered plan B.

3D printing would I think be an option too, yes.
 

MaxDale

New Member
Here is my solution that works fine. Of course not the ideal one, since you loose access to bleeding screw.
 

Attachments

  • IMG_0917.jpeg
    IMG_0917.jpeg
    1.1 MB · Views: 56
  • IMG_0916.jpeg
    IMG_0916.jpeg
    1.2 MB · Views: 44

gfacer

Active Member
Yes, like that, I tapped but a nut works fine too, and then drill a hole in the middle...hence why I used brass and it was still tricky.

I just put back together, changed a few O rings with only sorta kinda the right size, and seems to work for the moment. At least I know what the dampening is supposed to feel like!

If it stops working, I now feel like I could figure out the full rebuild with the parts from improvepart.com and some o-ring detective work. I did mess up the boot some reinstalling the fork, that sucked....not that it was perfect before.
 

JohnnyD

Well-Known Member
Yes, like that, I tapped but a nut works fine too, and then drill a hole in the middle...hence why I used brass and it was still tricky.

I just put back together, changed a few O rings with only sorta kinda the right size, and seems to work for the moment. At least I know what the dampening is supposed to feel like!

If it stops working, I now feel like I could figure out the full rebuild with the parts from improvepart.com and some o-ring detective work. I did mess up the boot some reinstalling the fork, that sucked....not that it was perfect before.
Thankfully, the boot is pretty easy to change WITHOUT disassembling the entire fork. There is a video on YouTube showing the process, but basically you put the boot on over the top of the fork inside out and then once you get it past the lower bearing you carefully flip back to the right way and TADA! A brand new headshok boot installed without doing anything but removing the fork from the bike.

You can do a similar trick with the Lefty boot by carefully pulling it up and over the axle.
 

gfacer

Active Member
My problem was more that I pinched it ft
Trying to get the bearings right. Apparently on the raven the fit on the frame is quite loose but the headshok side is tight.

While I was figuring that out on the top, I had pinched and cut the top edge of the boot.
 
Top